Getting Ready to Record
- As this is a pre-recorded presentation, relax and know you can redo any section you want to.
- Camera positioning – think in thirds – you want to take up a third of the screen with approximately a third of your body visible. This means that the audience will see you from mid chest up. Also, the top third of your computer or camera should be on eye level – this means you will be looking straight at the camera, not down or up at it.
- Sit in a sturdy chair with your feel planted on the ground. Do not use a swivel or reclining chair. Being nervous can make you can swing or rock unknowingly, and this visual distraction will takeaway from your presetnation.
- Look into the camera, but don’t stare – remember to blink. If it makes it easier, have someone sit behind the camera and speak to them.
- Body language is important – be relaxed, if you use your hands, use them, and be animated – tilt your head, smile, etc..
- Make sure your volume is correct and you are coming across clearly. Ensure there are no background noises that could drown out what you are saying.
- Be aware of your surroundings. Make sure your background is uncluttered and clean; doors should be closed, blinds adjusted. Avoid having a background that will distract those listening to you.
- Lighting is important. If you don’t have perfect lighting, you can create it. If you have access to a window or a major light source, set up facing it. Never have it behind you. You want your light to come from in front or from both left and right side. Play around with your lighting until you get the look you want.
Presenting
- Avoid jargon or abbreviations. Remember, those listening to your presentation will have various backgrounds and you want to ensure everyone understand what you are saying. Simple, straightforward points will help make sure your presentation is understood.
- Try not to read from a script, if you are worried about forgetting something, post prompt words around your monitor. Remember, you can stop and start the recording and do as many retakes as it takes to get the version you want.
Recording your Presentation
Before you begin:
- Close all other tabs and programs that are open on your computer
- Open only those platforms that you will need for your recording.
- i.e. if you have a pdf document or a PowerPoint, open them in the background on another tab so that you can easily toggle to that page at the appropriate moment.
- If you are using PowerPoint, place it in presentation mode so it is ready when you begin sharing your screen
Preparing to record:
- Go to: https://zoom.us/
- Either: Sign in to your account or sign up, it’s free (and follow the instructions to activate your account)
- Then: “Schedule a Meeting”
- For “Topic” enter CCRC 2021
- Once you’ve entered the Topic, go to the bottom of this page and click: “Save”. It is not necessary to complete any of the other fields on this page, other than the Topic field.
- In the top right corner, click on: “Start this Meeting”.
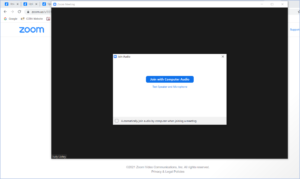
- Open or Launch Zoom. On this page, it’s important to “Test Speaker and Microphone”. When both tests are successful, then click on “Join with Computer Audio”.

- If you wish to have your image on the screen during the presentation, ensure that your camera is turned on (The camera icon should not have a red line through it. Simply click on the icon to enable your camera.)
For presentations with multiple presenters, invite co-presenters to the Zoom meeting room by sharing the meeting link or by clicking “Invite” in the lower menu bar.
Recording Your Presentation
- Click on the “share screen” and bring your presentation onto your screen
- If using PowerPoint ensure that it is in presentation mode
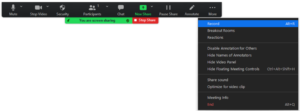
- Your presentation should now take up the entire screen with a green band (You are screen sharing) and red band (Stop Share) across the top
![]()
- If your image is on the screen, position it where it won’t cover any of your material
- To begin recording roll your cursor over the green/red bar and a larger black band will appear – click on the far right section “More” (with 3 dots) and click “Record”

- The computer will announce that the presentation is now being recorded
- Begin your presentation
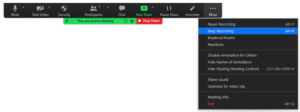
- When you have finished your presentation, go back to MORE and click “Stop Recording”.

Take 2 – Want to redo your presentation? Simply stop the recording and begin again.
- When you are finished recording your presentation click “End”. All session recordings will be downloaded to a file and you can choose the one you prefer.
Final Presentation
- Your presentation will be saved on your computer. (Typically, in your documents under a Zoom file folder.)
- Remember to rename your presentation video to the appropriate file name:
- Presentation ID_First Name_Last Name
A video guide on how to record your presentation for the CCRC is available below.
For additional information visit: https://www.youtube.com/watch?v=GjhHsTmXCKg
